Every Digital Product Passport guide explains the regulation, and almost none of them shows the work. This one does the opposite: it follows the whole path inside a WooCommerce store, from installing the plugin to the first public page scanned from a phone.
Take the title seriously but not literally. Twenty minutes is enough to install, set what holds true across your catalogue, and generate passports for several hundred references. What takes longer afterwards is the exceptions, and those get handled as they come.
What you need before you start
A WooCommerce store, some products, and your fibre compositions written down somewhere. That is all. No developer, no connector, no ERP.
Two things help a great deal if you already have them: product attributes filled in rather than free text in descriptions, and categories that group items of the same material. If that is not your situation it is not a blocker, it just moves work into step 3.
Technically you need WordPress 6.4 or later, WooCommerce 8 or later, and PHP 8. It all runs on ordinary shared hosting, with no external service.
Step 1, install the plugin
DPTag is on wordpress.org, so it installs from your own dashboard and updates like any other plugin.
- In WordPress, open Plugins, then Add New Plugin.
- Search for DPTag.
- Install it, then activate.
- The setup wizard opens by itself.
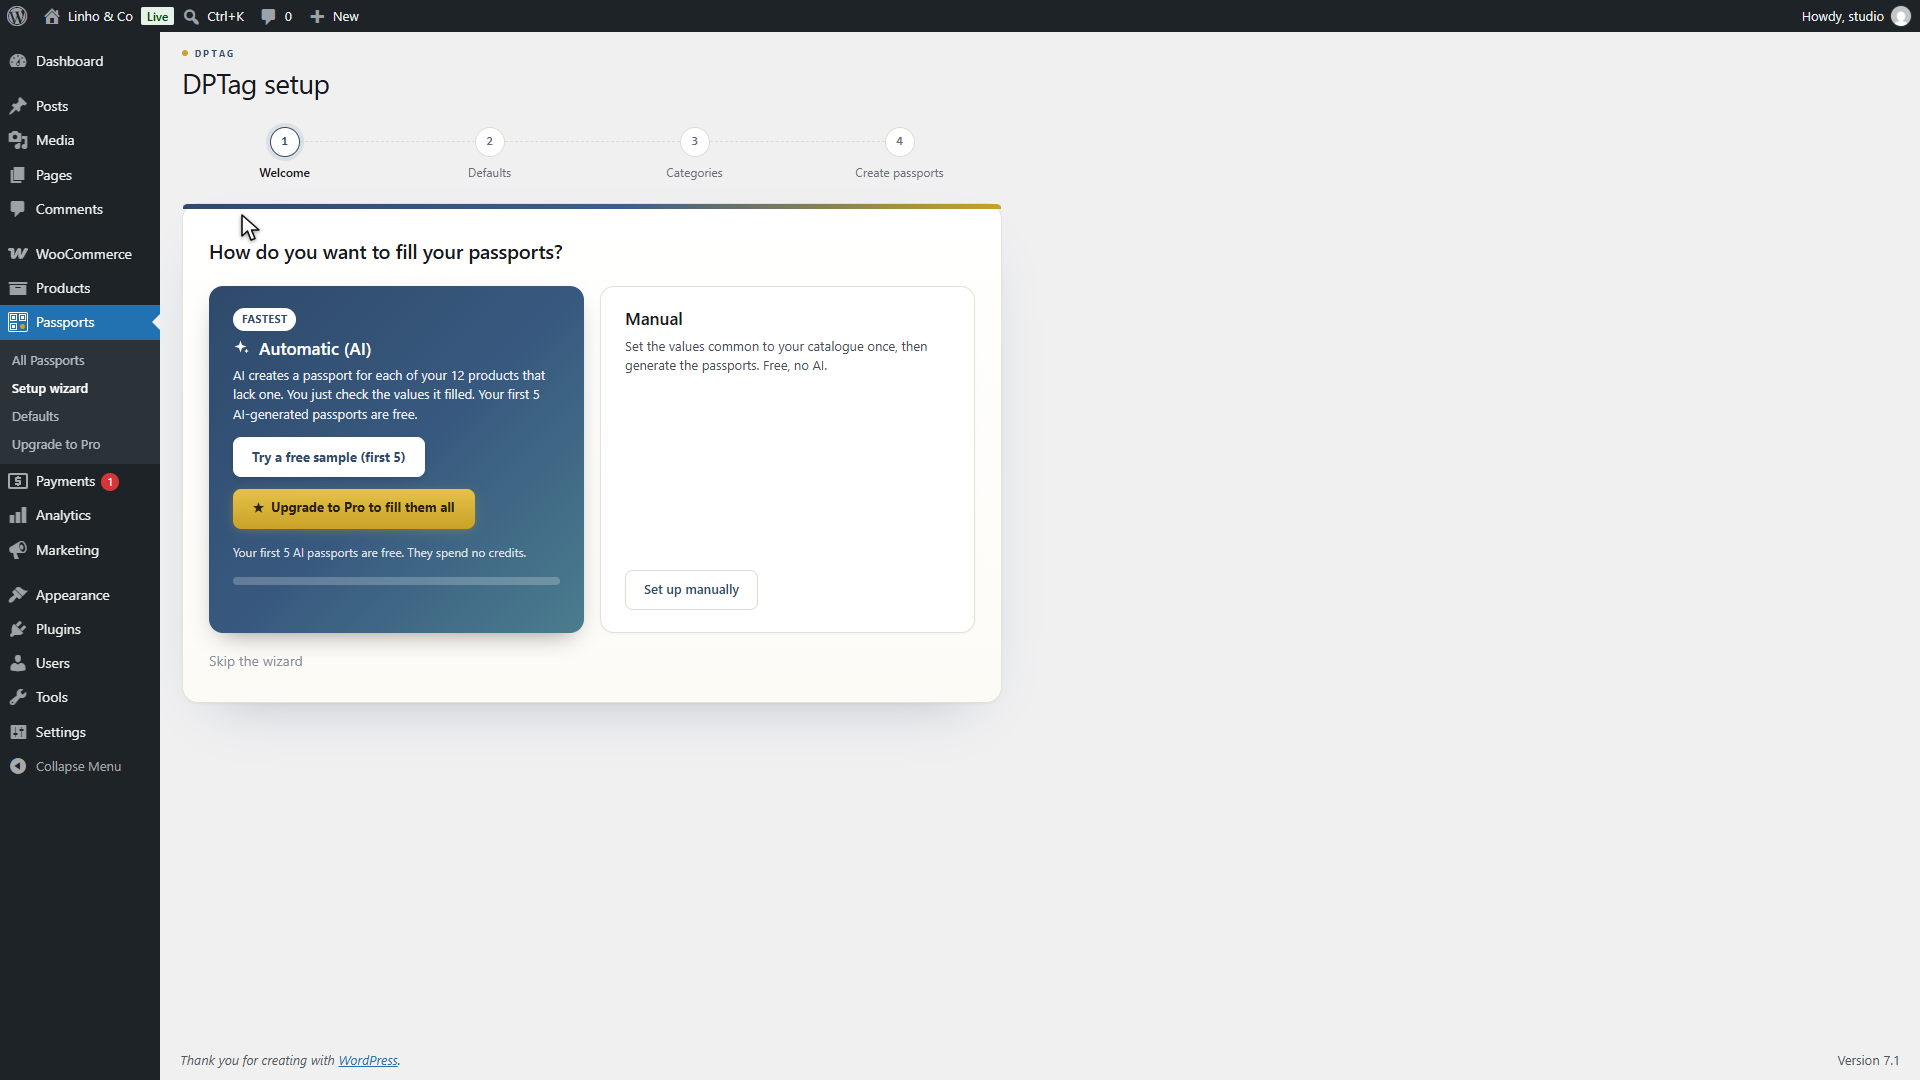
The setup wizard opens by itself after activation. It has four steps and can be restarted at any time from the Passports menu.
Its first question is how you want to fill things in: automatically, with AI proposing values per product, or manually, where you define once the values your catalogue has in common. This guide follows the manual path, which is entirely free and uncapped. The AI path saves time on a large, varied catalogue, and runs on credits.
Step 2, the store values
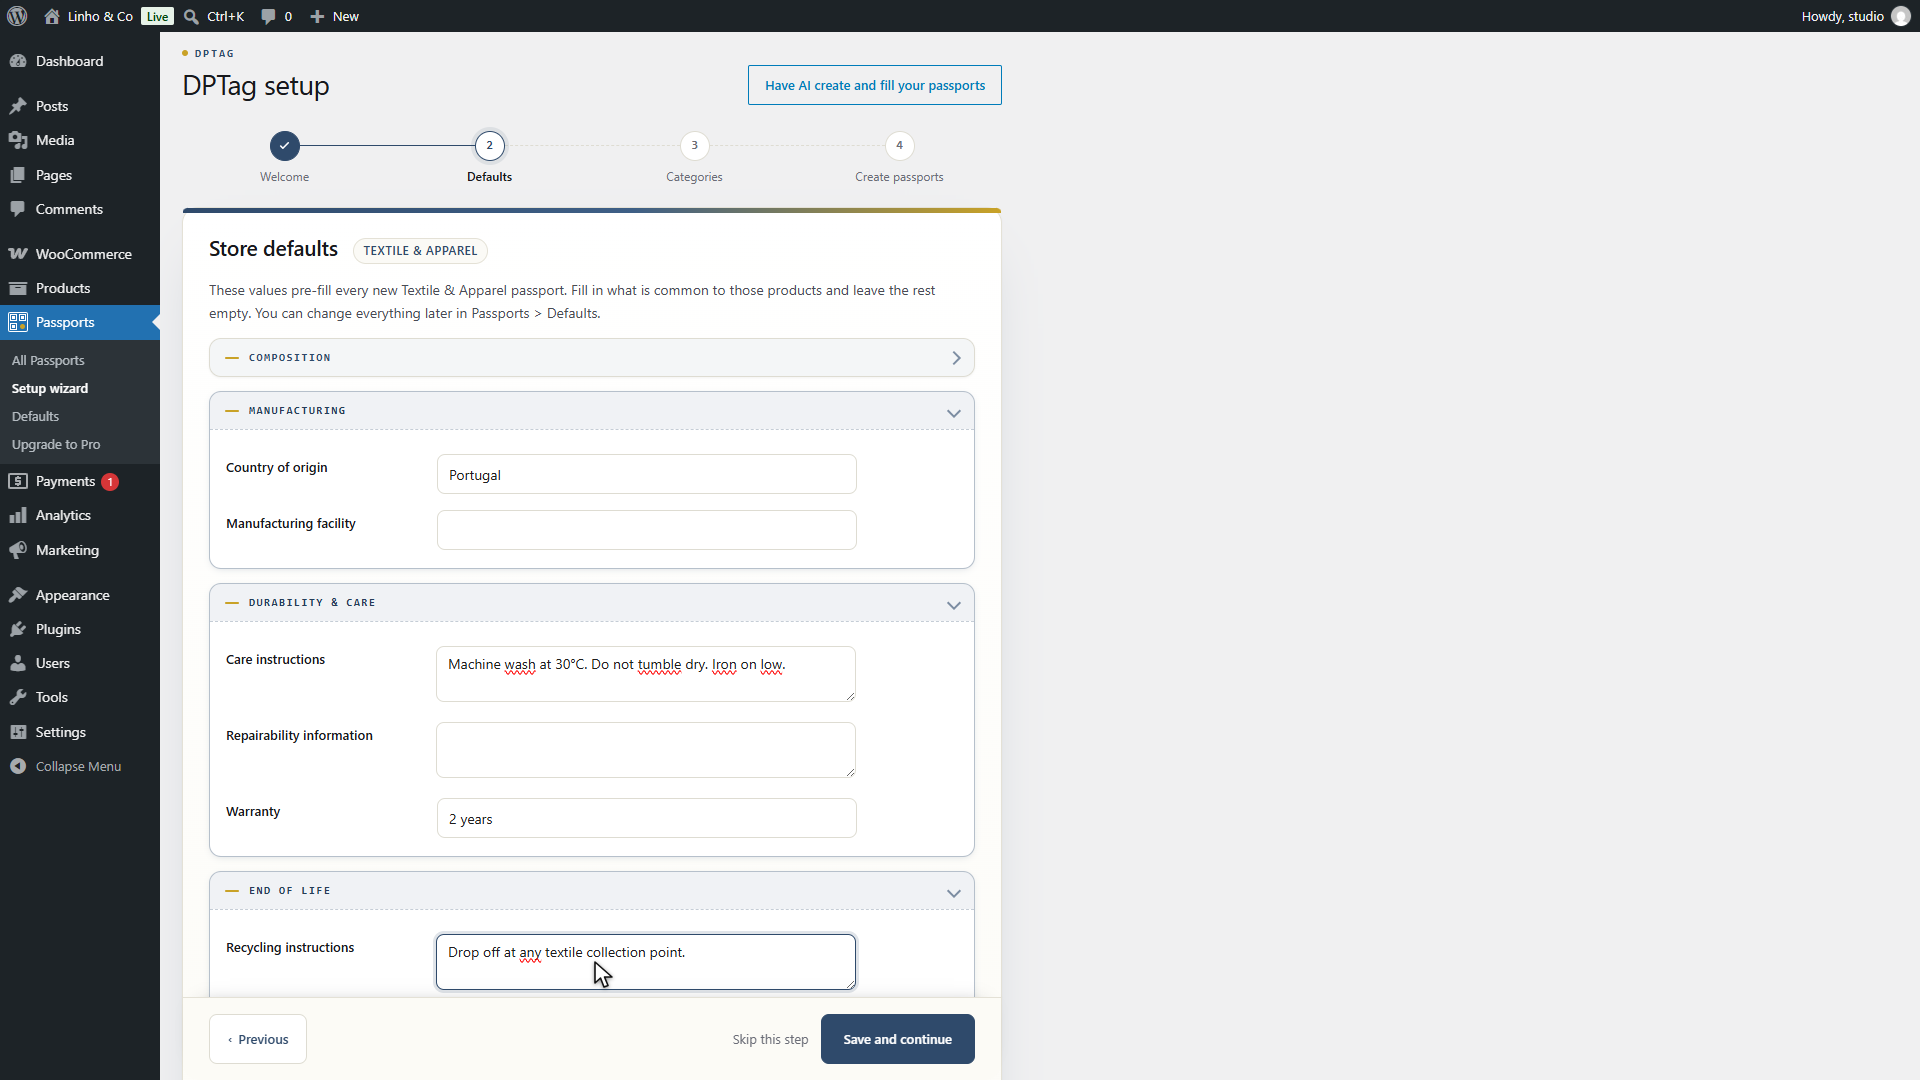
This is the widest layer: what is true of nearly everything you sell. In practice, the brand and the main country of manufacture.
The rule is simple and worth understanding, because it governs everything else. A value can come from three places, and the most specific wins: the product attribute first, otherwise the category value, otherwise the store value. So you fill in the general here, and you will only come down to the product for exceptions.
Do not try to fill everything. A field left empty stays empty, it invents nothing, and it can be filled later.
Step 3, composition per category
This is the step that does the heavy lifting, and where twenty minutes are won or lost.
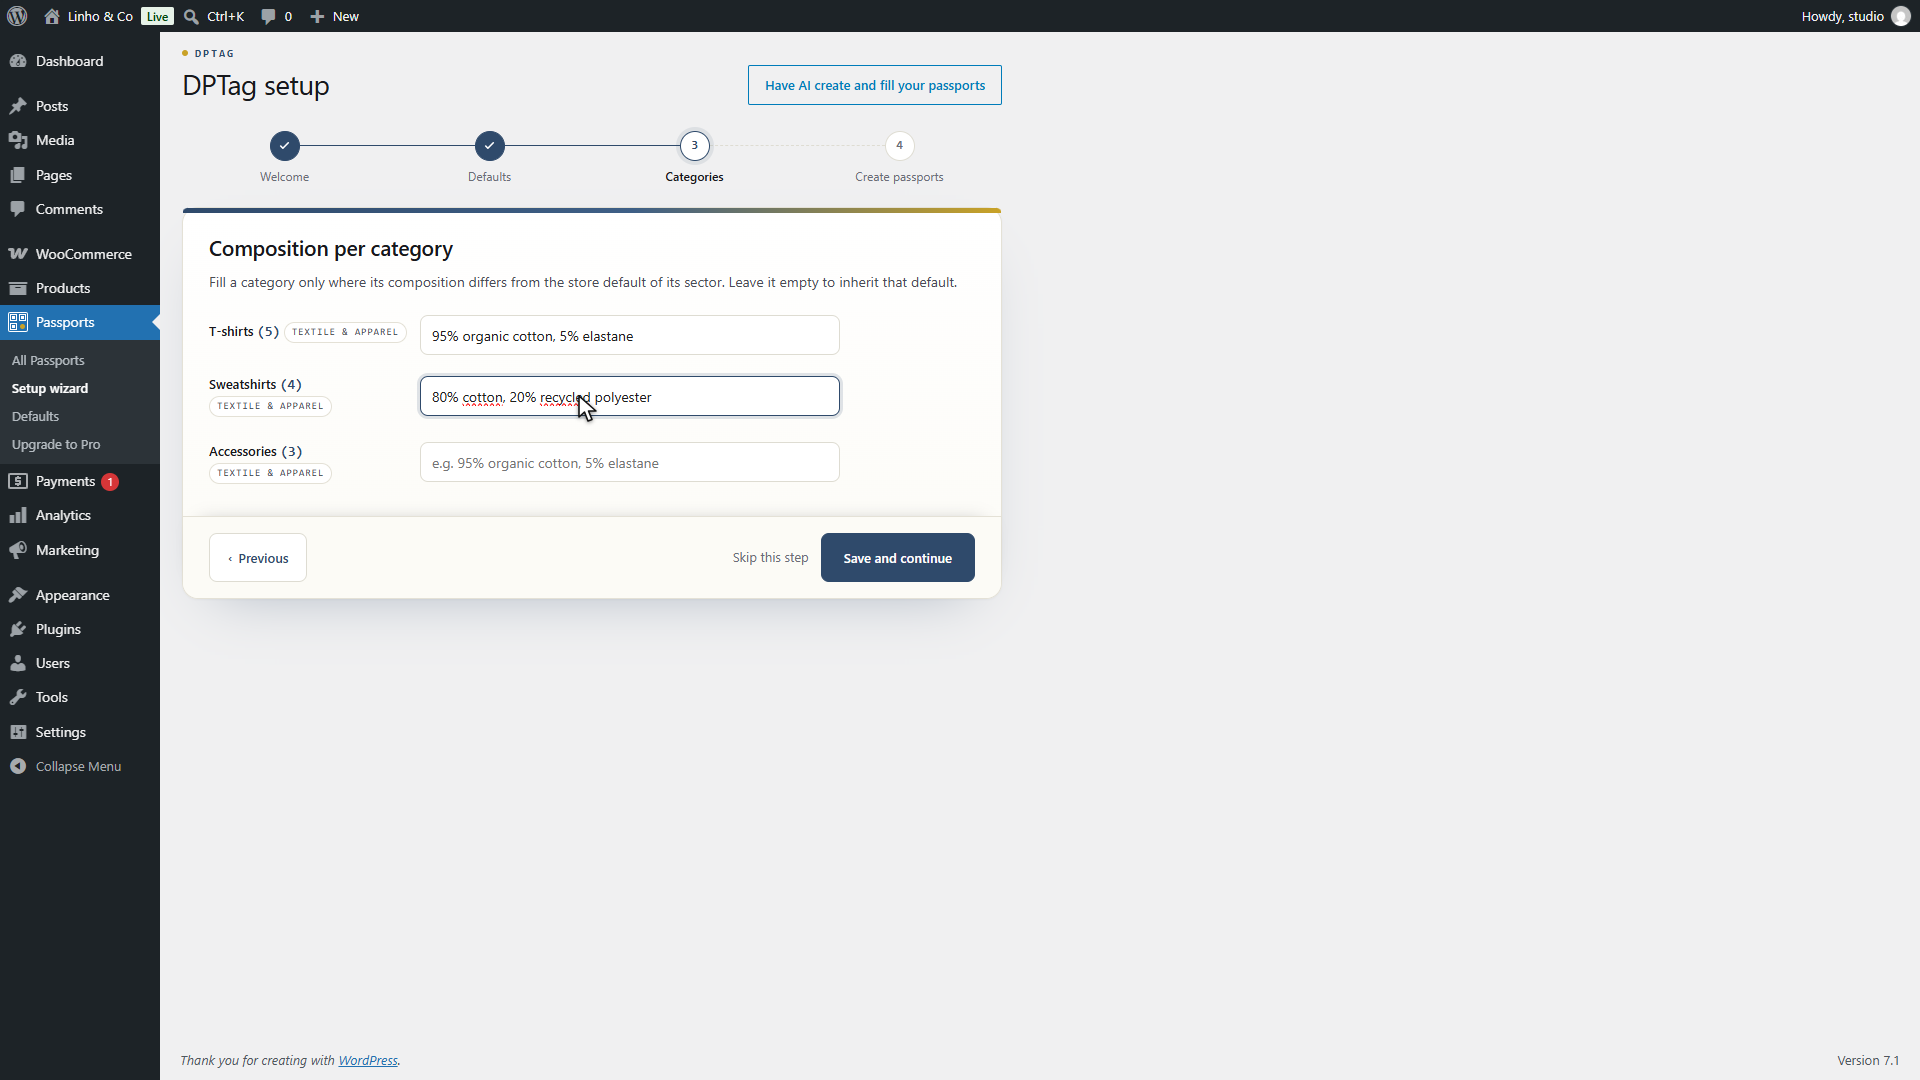
A clothing store sells the same fabric across dozens of references. Rather than typing the composition product by product, you set it once per category: organic cotton tees, wool knits, canvas trousers. Every product in the category inherits it.
The field accepts both ways of writing a composition, 80% cotton, 20% polyester as well as Cotton 80%, in English or French, with or without
accents. A running total tells you where you stand against one hundred percent.
On a store of three hundred references spread over eight categories, this step takes about ten minutes and covers most of the catalogue.
If your composition lives in descriptions
This is the most common situation, and the only real obstacle on the path. There are two routes, and the right one depends on the time you have.
The fast route is to touch no products at all and play everything through the category layer in step 3. You get a complete catalogue in one sitting, at the cost of some approximation on unusual items, which you correct one by one later.
The durable route is to create a composition attribute in WooCommerce and fill it in, starting with your best sellers. It takes longer, but it pays twice: the passport becomes exact per product, and your product page gains information that the textile fibre regulation already requires you to show before purchase.
In practice most stores do both, in that order: the category first so the catalogue is alive, then the attribute, at the pace of restocking.
Step 4, create the passports
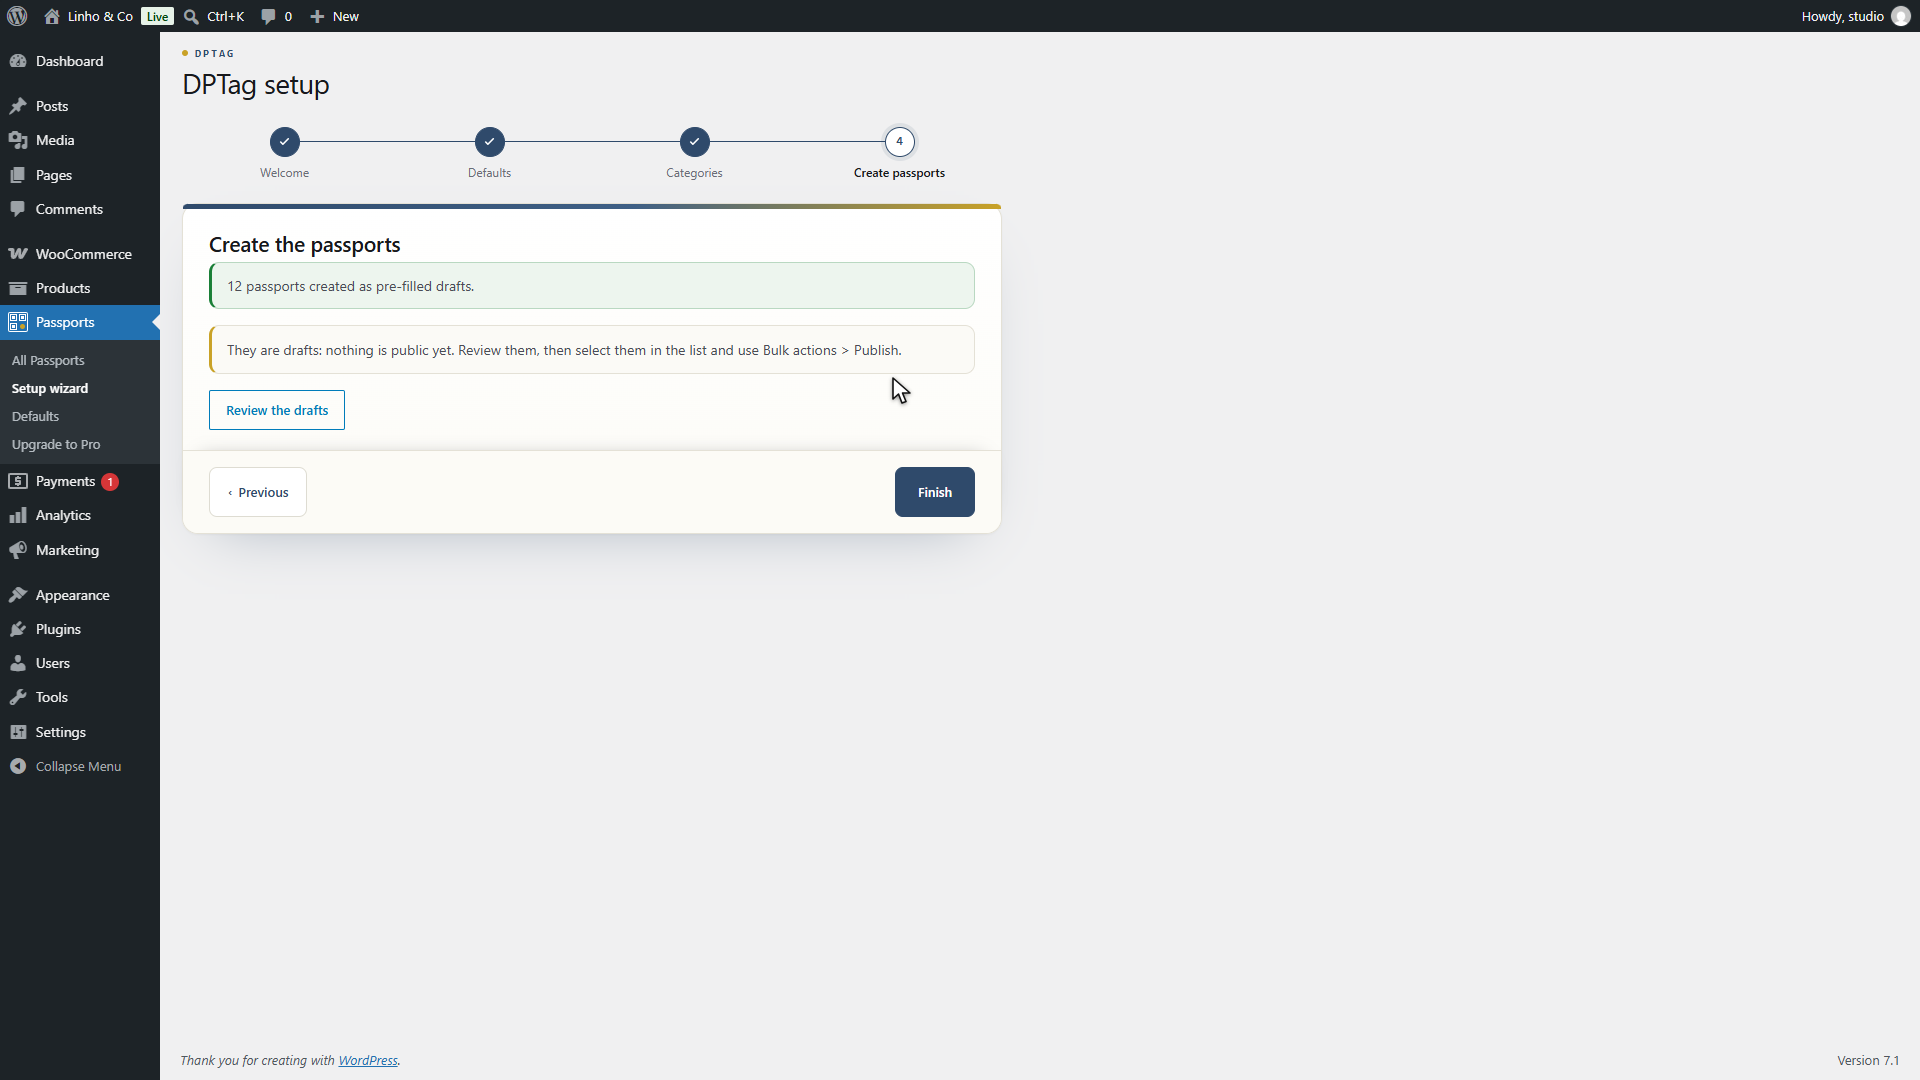
The last step creates passports for every product that has none, in batches of a hundred, with a progress bar. A catalogue of several hundred products goes through in a few minutes.
There is no cap. The free plugin publishes as many passports as your catalogue has products.
At the end the wizard tells you how many passports were created, and, more usefully, whether any are empty. An empty passport is not a silent failure: it reports that neither the attribute, nor the category, nor the store had a value for that product.
What you have now, and where to see it
Three places change in the admin.
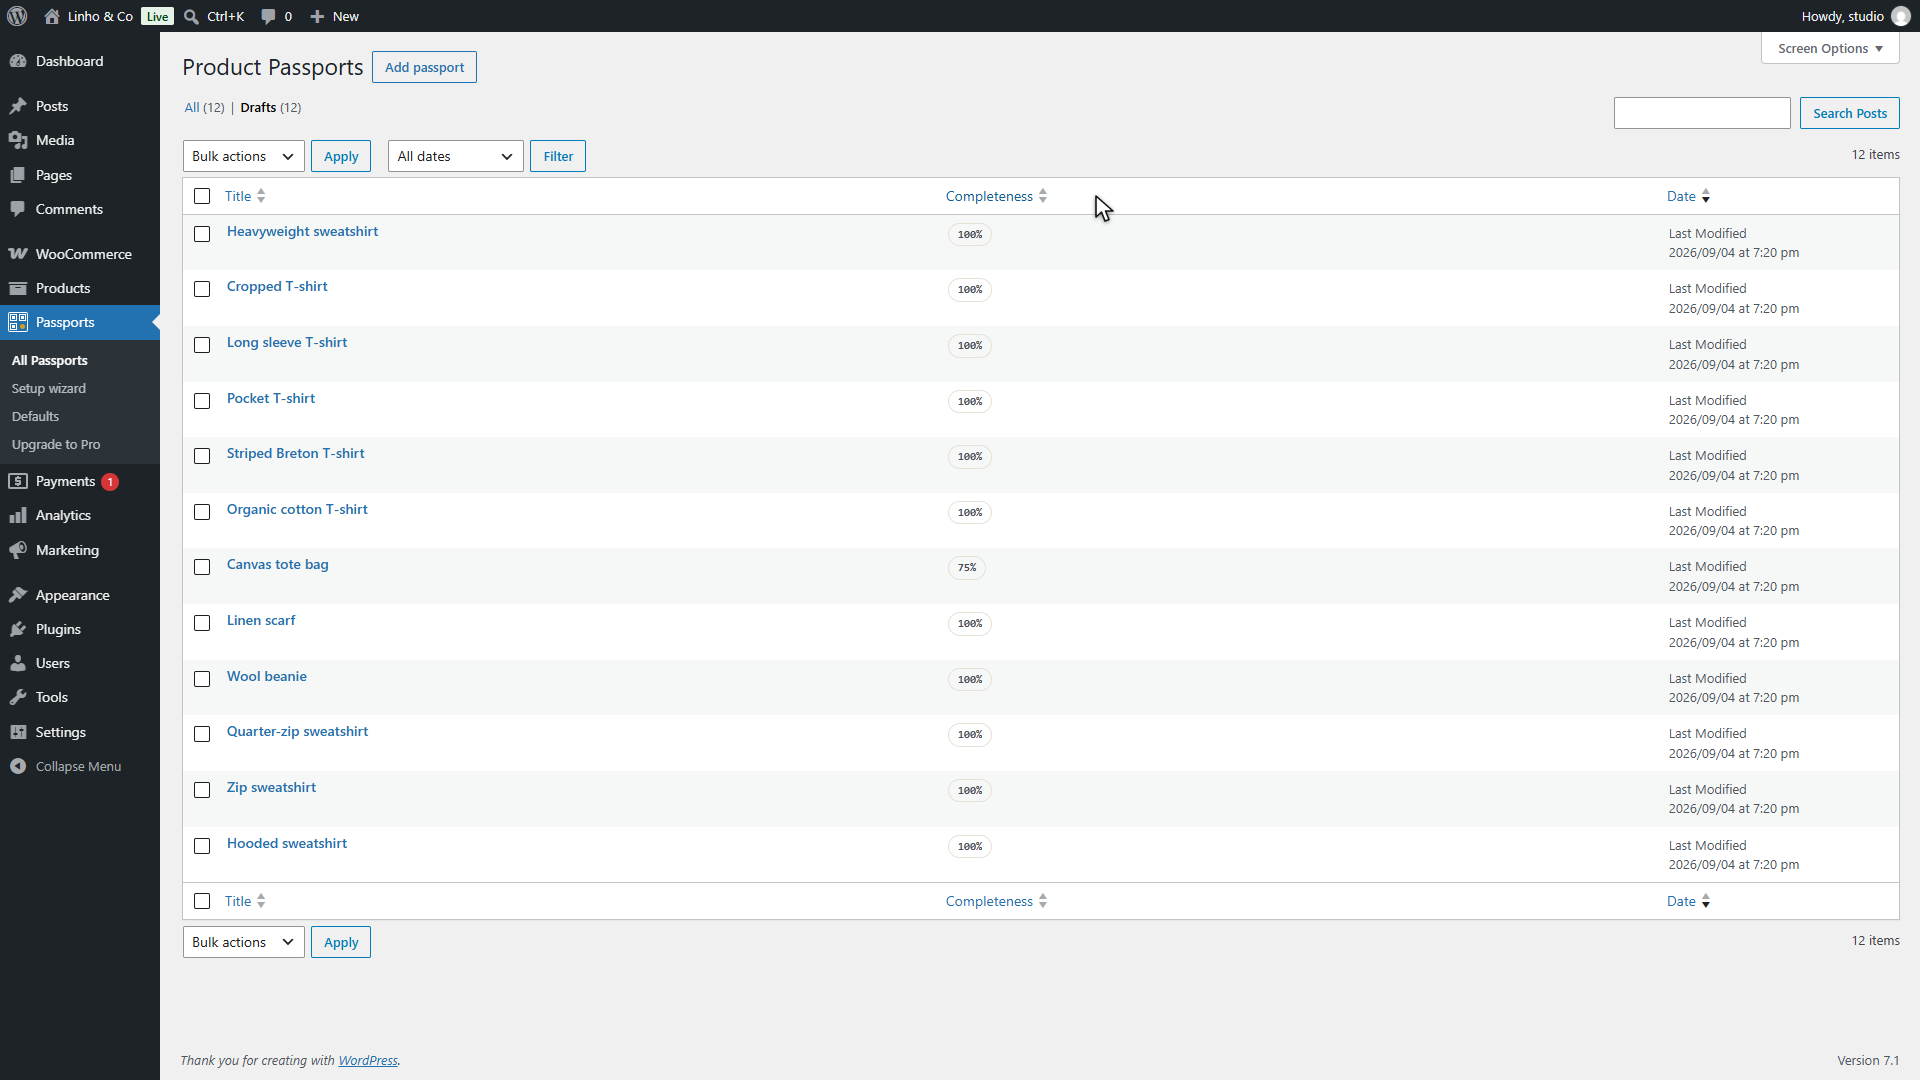
The products list gains a column showing each item's passport state, which is the fastest way to spot gaps.
The product screen gains a passport panel, with the guided form and its materials repeater.
The Passports menu lists every passport, independently of products. That list carries a Completeness column, and it sorts: ascending puts the emptiest passports at the top. That is your work queue for the following days, and it beats reading through the catalogue alphabetically.
That last point deserves a sentence, because it is not decorative. A passport is a piece of content in its own right, with its own revision history, and it survives the deletion of the product. That is what lets a QR code printed on a label keep answering after a model has left the catalogue.
The public page and the QR code
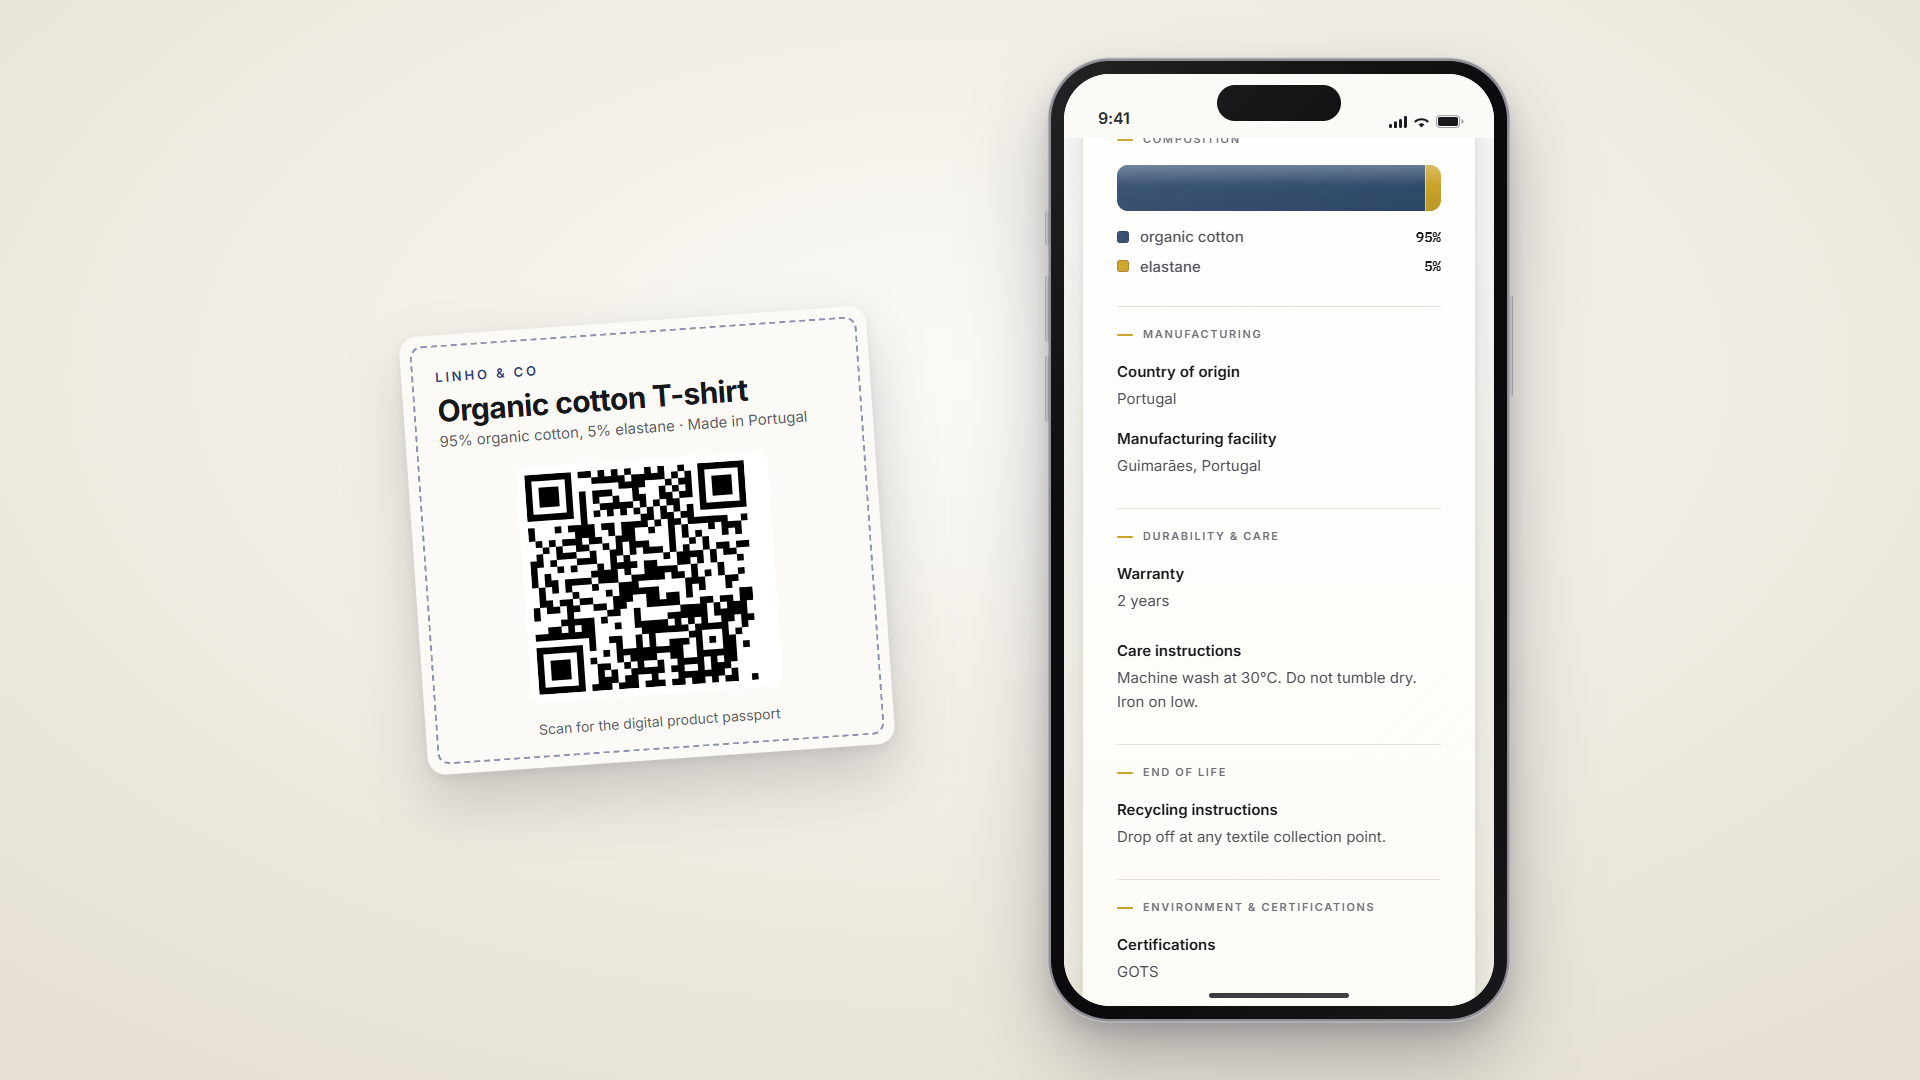
Every passport has a public address shaped like /dpp/ followed by a unique,
immutable identifier. The page stands alone, does not load your theme, and reads
on a phone: that is where it will be opened, in a shop or while unwrapping a
parcel.
It shows the product name, the brand, the composition as a segmented bar, the origin, care instructions and certifications. The composition bar is computed so its segments stay distinguishable even in black and white, which matters the day somebody photocopies a label.
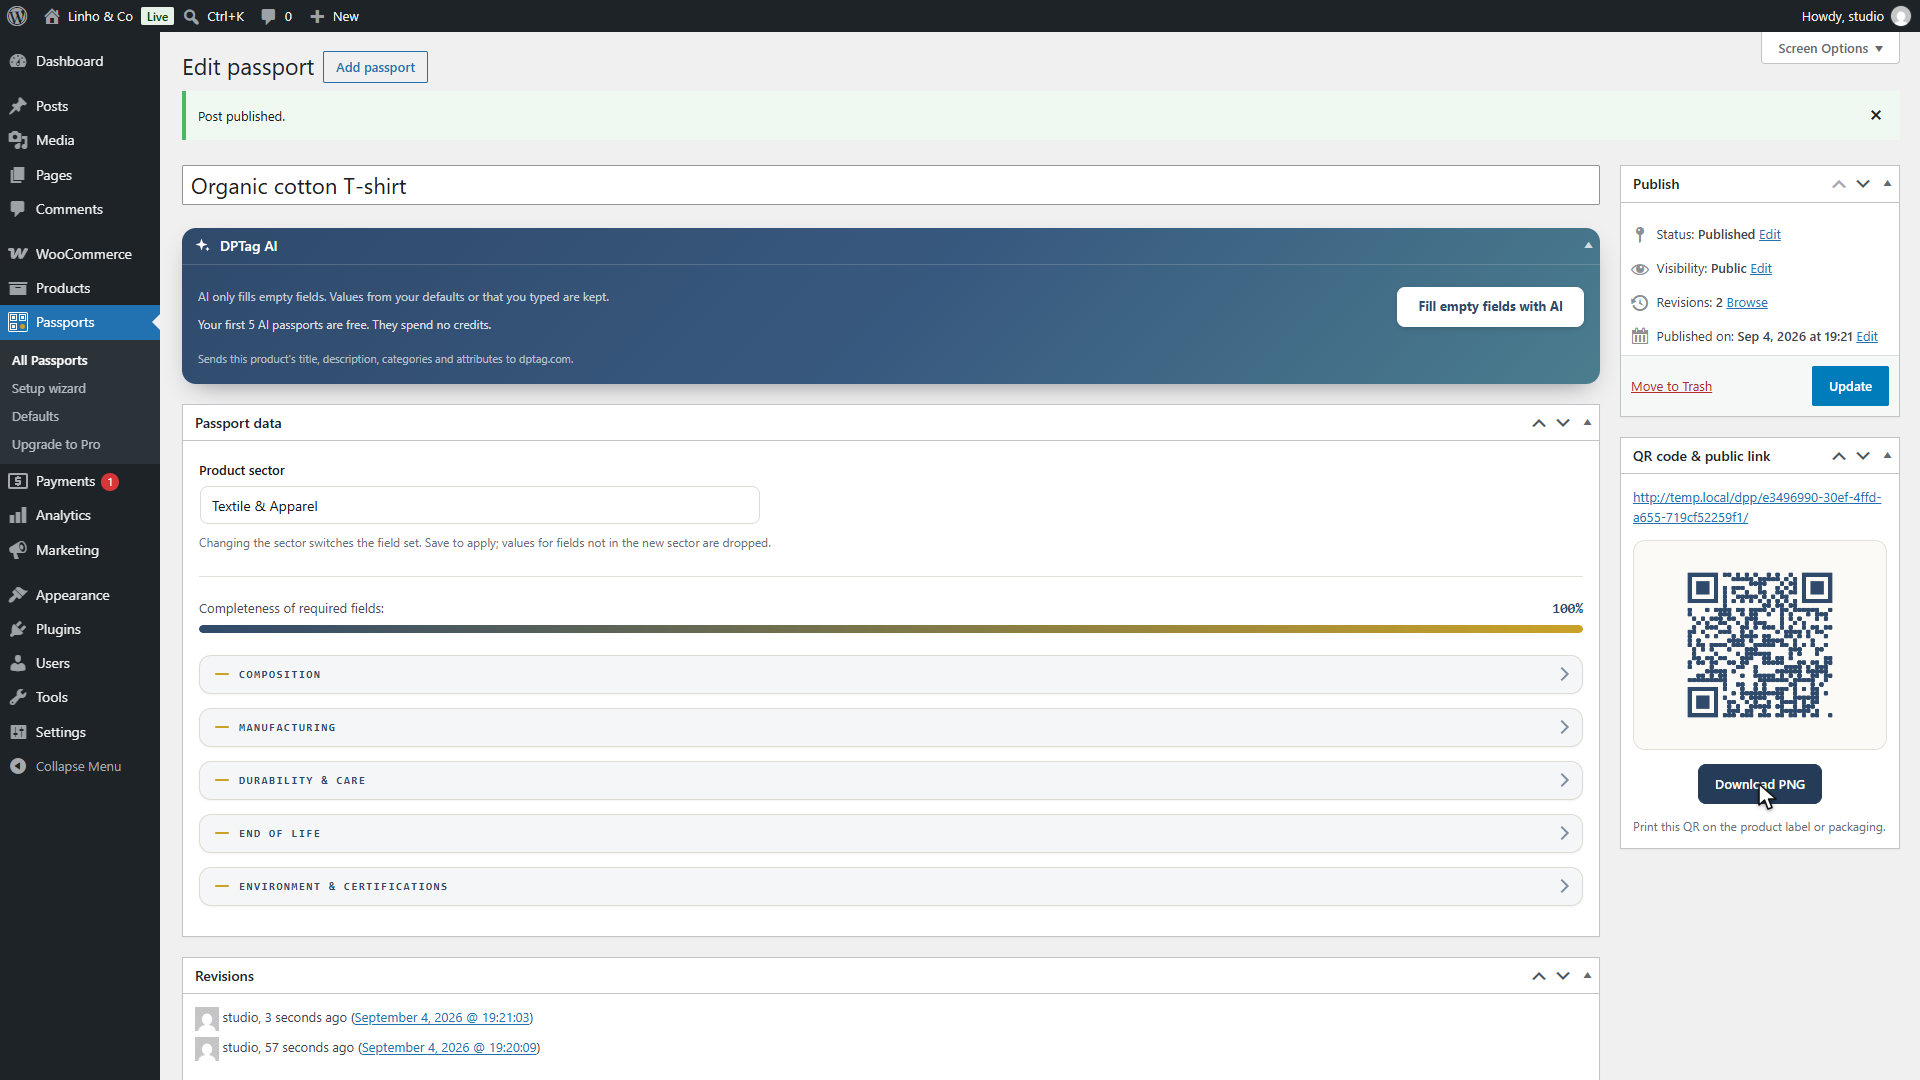
The QR panel on the product screen generates the code, quiet zone included. PNG download is in the free plugin. SVG and bulk export are in the Pro add-on, because a label printer asks for vector files.
Before ordering a print run, do the test that counts: print the code at its real size and scan it with an ordinary phone. The details of that check are in the article on labels and QR codes.
Correcting a passport after printing
This is the fear that most often stops a store from starting: printing a thousand labels, then finding a composition error.
It is unfounded, and that follows from how the public page is served. The QR code does not hold the data, it holds an address. Correct the passport in the admin, and the label already sewn in points at the corrected version.
One technical detail decides that behaviour, and it is worth knowing because not every tool does it. The public page is never cached for a fixed duration: it is revalidated on every visit, with a validator covering both the data and the rendering. A browser cache cannot be purged remotely, so a page cached for an hour would stay wrong for an hour on the customer's phone, with no recourse. Here, the correction shows on the next scan.
What cannot be corrected is the address encoded in the printed code. Hence the insistence on the immutable identifier, and on a passport outliving its product.
Three mistakes that cost time
Starting with products. It is the natural reflex and the most expensive one: the work becomes proportional to the number of references. Always start with the store, then the category, and only come down to the product for what is genuinely particular.
Wanting a complete catalogue on the first pass. A partial passport is useful and can be completed. A half-finished catalogue is closer to the goal than a perfect plan never started.
Printing before scanning. A badly sized QR code does not half fail, it does not read at all, and the defect only shows once the labels have been delivered.
Where to go next
You have a catalogue of passports, public pages and QR codes. What remains is refinement: completing the exceptions product by product, adding batch numbers for production runs, and, if you sell abroad, translating the passports.
To understand what the regulation actually asks, see the passport seen from WooCommerce. To know which data to prepare first, see the textile passport data.