This page follows the same path as the video above, on the demo store used to record it: twelve products in three categories, no passport yet. At the end, every product has a pre-filled draft passport, one of them is published, its QR code is on your desk and its public page opens on a phone.
Two things are worth knowing before you start. The free plugin is complete: no cap on the number of passports, every sector template, the full public page and the QR codes. And nothing here needs a developer, a server setting or an account. The only prerequisites are WordPress 6.4, WooCommerce 8 and PHP 8.0 or later.
Install the plugin
DPTag is a WooCommerce plugin and installs like any other one. The installation page has the details, the requirements and the fixes for the rare cases where something looks off.
DPTag is on wordpress.org, so it installs from your own dashboard and updates like any other plugin.
- In WordPress, open Plugins, then Add New Plugin.
- Search for DPTag.
- Install it, then activate.
- The setup wizard opens by itself.
The plugin runs entirely on your own site. It makes no network call of its own: passport pages, QR codes and structured data are all generated and served from your WordPress. The one optional exception is the AI autofill, which only runs when you click it, and which this guide does not use.
Activate: the setup wizard
Activating the plugin opens its setup wizard, which asks one question: how do you want to fill your passports?
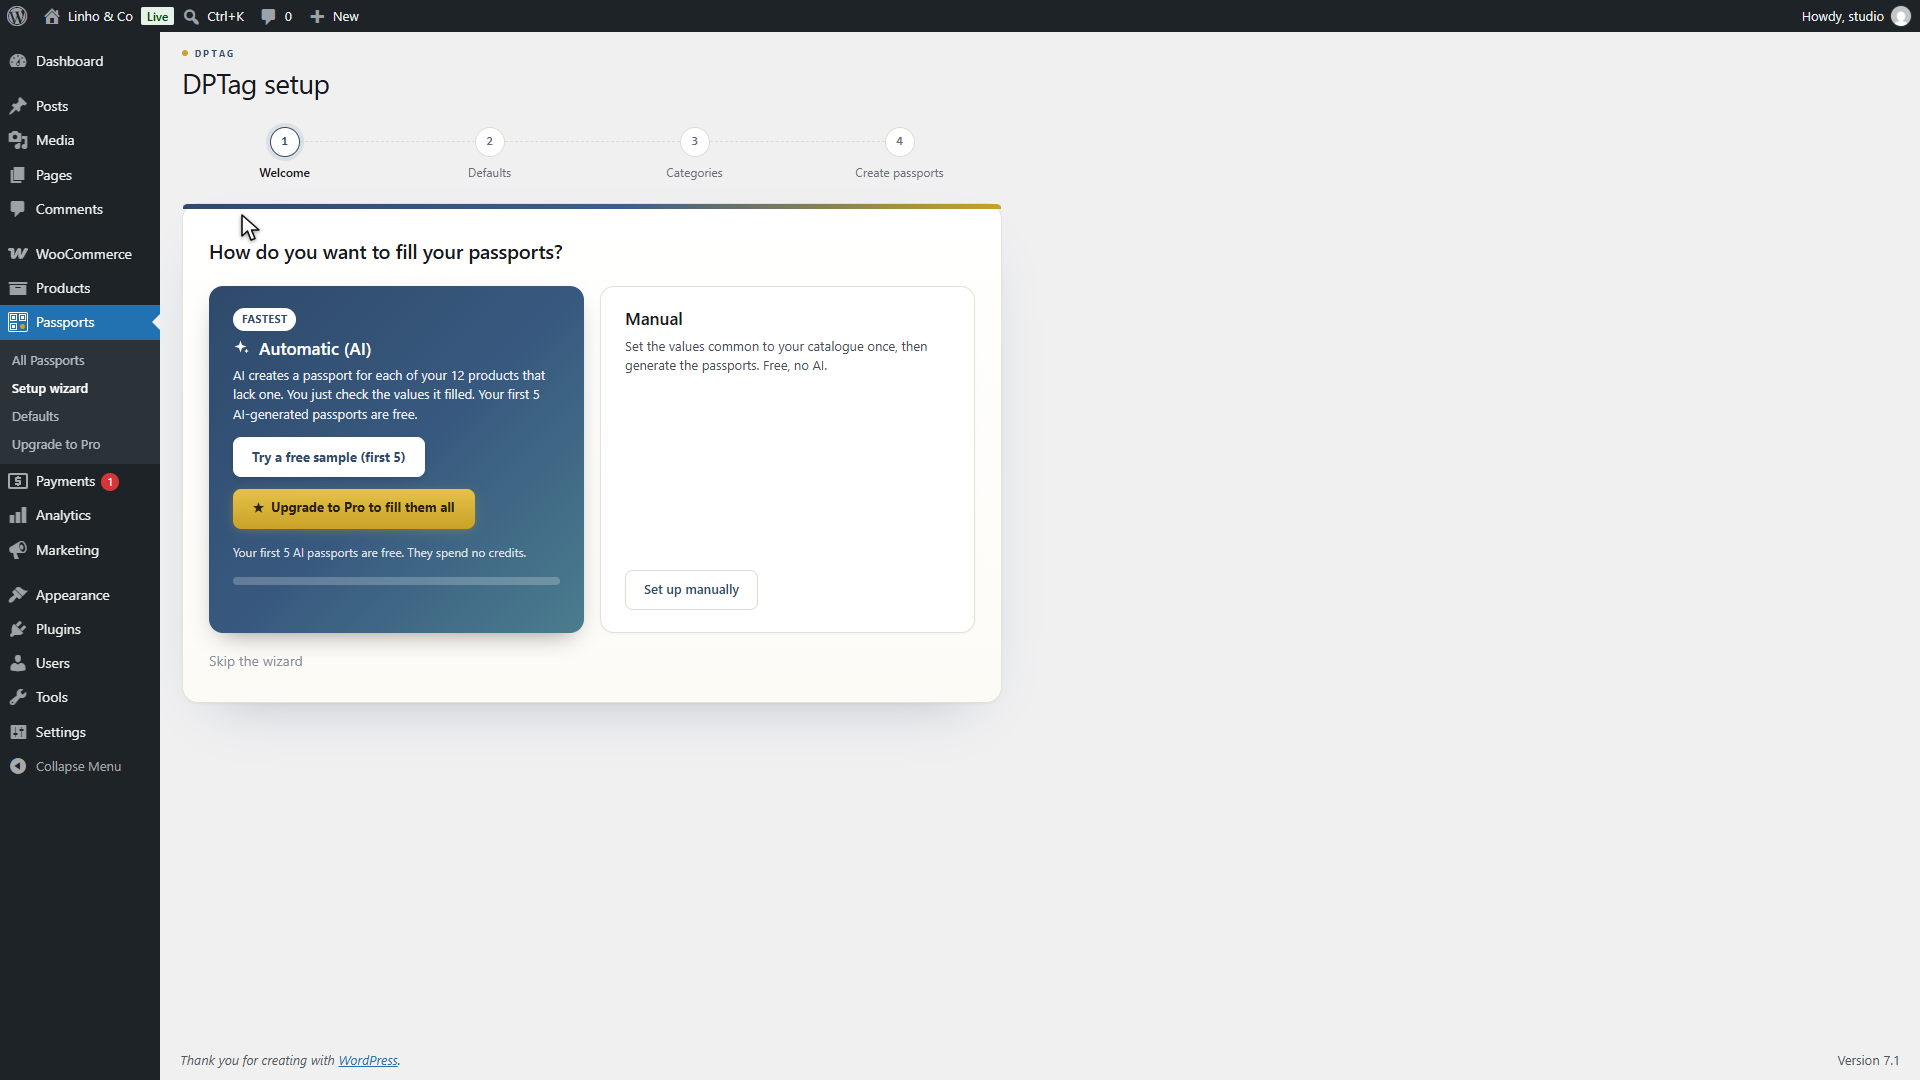
The automatic path lets AI create and fill a passport for each product; it is described on its own page. The manual path is the one this guide follows. It rests on a simple observation: most of the data in a passport is the same across a whole catalogue. Country of origin, care instructions, recycling instructions and warranty rarely change from one T-shirt to the next. The wizard captures those shared values once, and every passport is born with them already filled in.
Click Set up manually. The wizard can be reopened at any time from Passports, then Setup wizard, and skipped with the link at the bottom of the page. Each of its steps is described in full on the setup wizard page.
Step 1: store defaults
The first step collects the values common to your products, grouped the way the passport form is: composition, manufacturing, durability and care, end of life, environment and certifications.
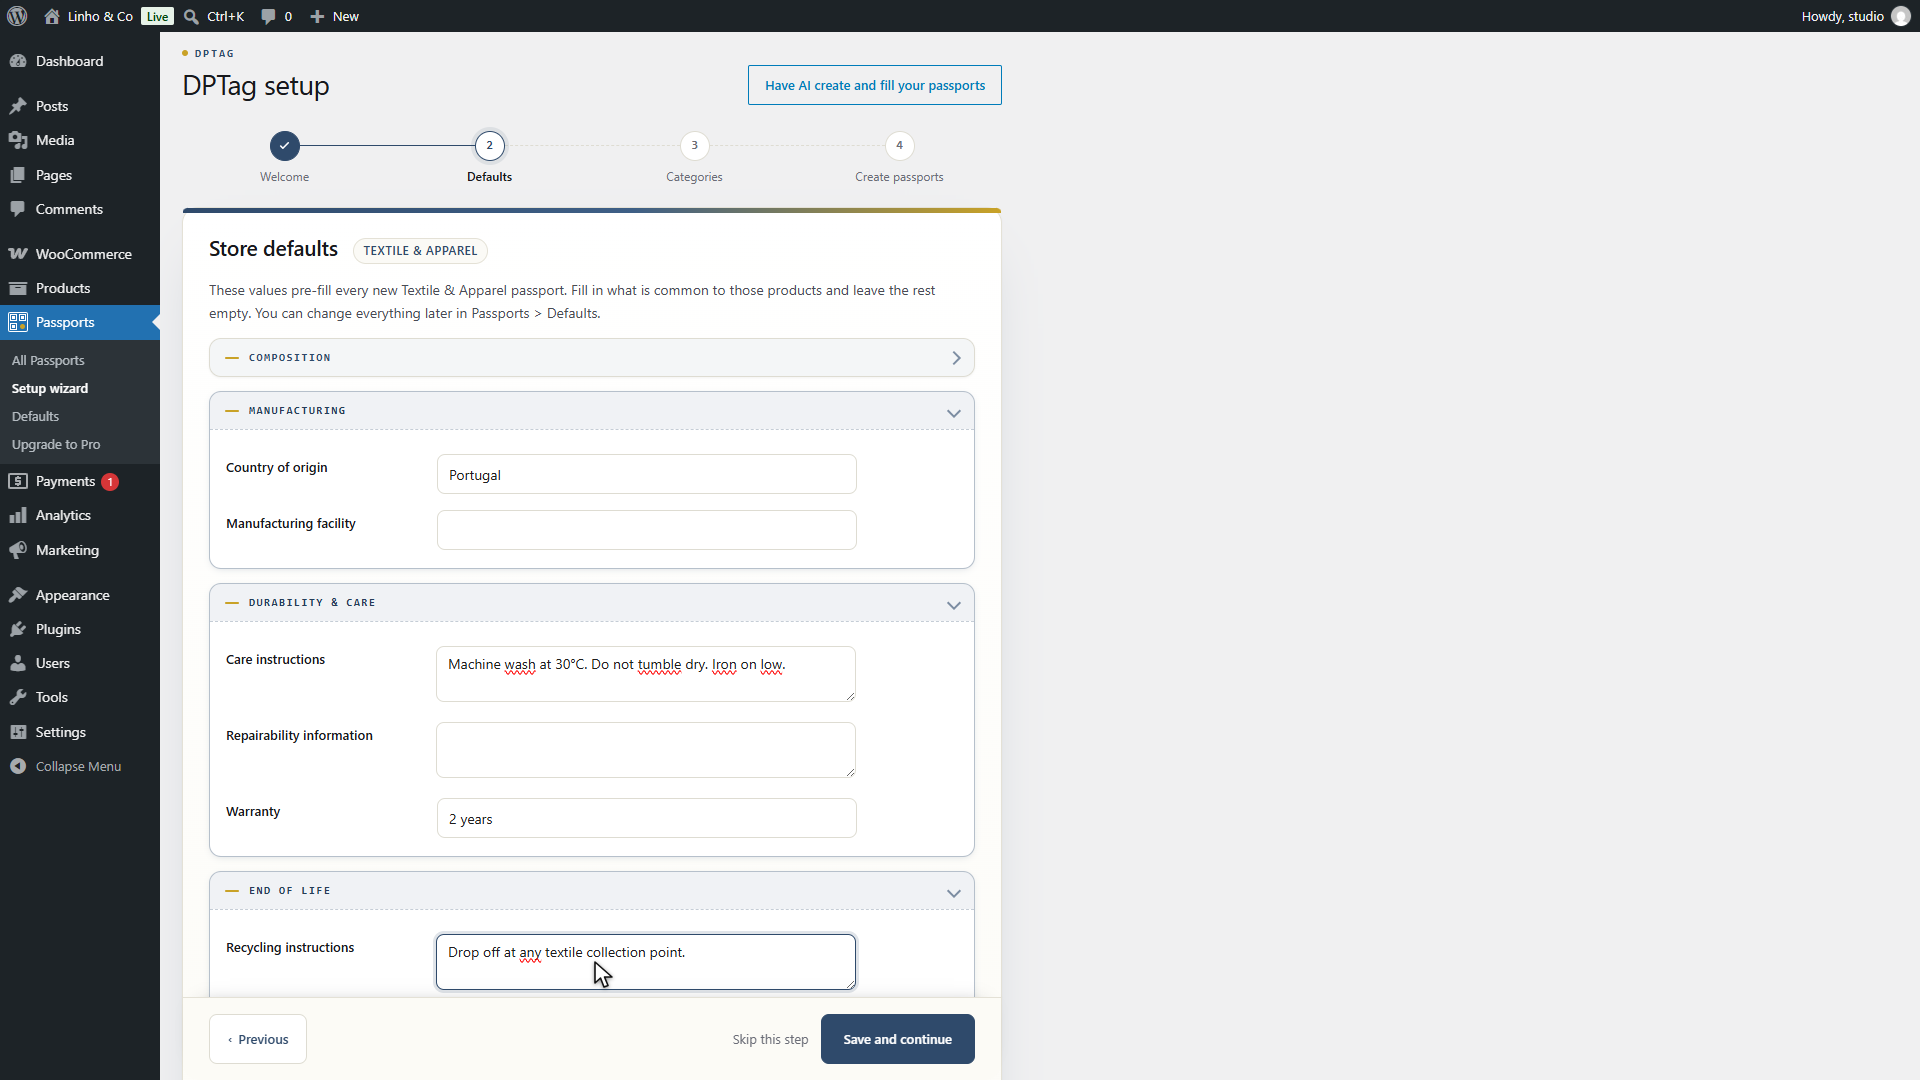
On the demo store, that is a country of origin (Portugal), one line of care instructions, a two-year warranty and one line of recycling instructions. Leave empty whatever varies from one product to the next: an empty default is not an error, it is a field you will fill on the passport itself. Everything entered here can be changed later under Passports, then Defaults.
Click Save and continue.
Step 2: composition per category
Composition is the one field that varies too much for a store-wide default and too little for a per-product entry. All the T-shirts of a range usually share the same fibres. So the second step asks for one composition per product category.
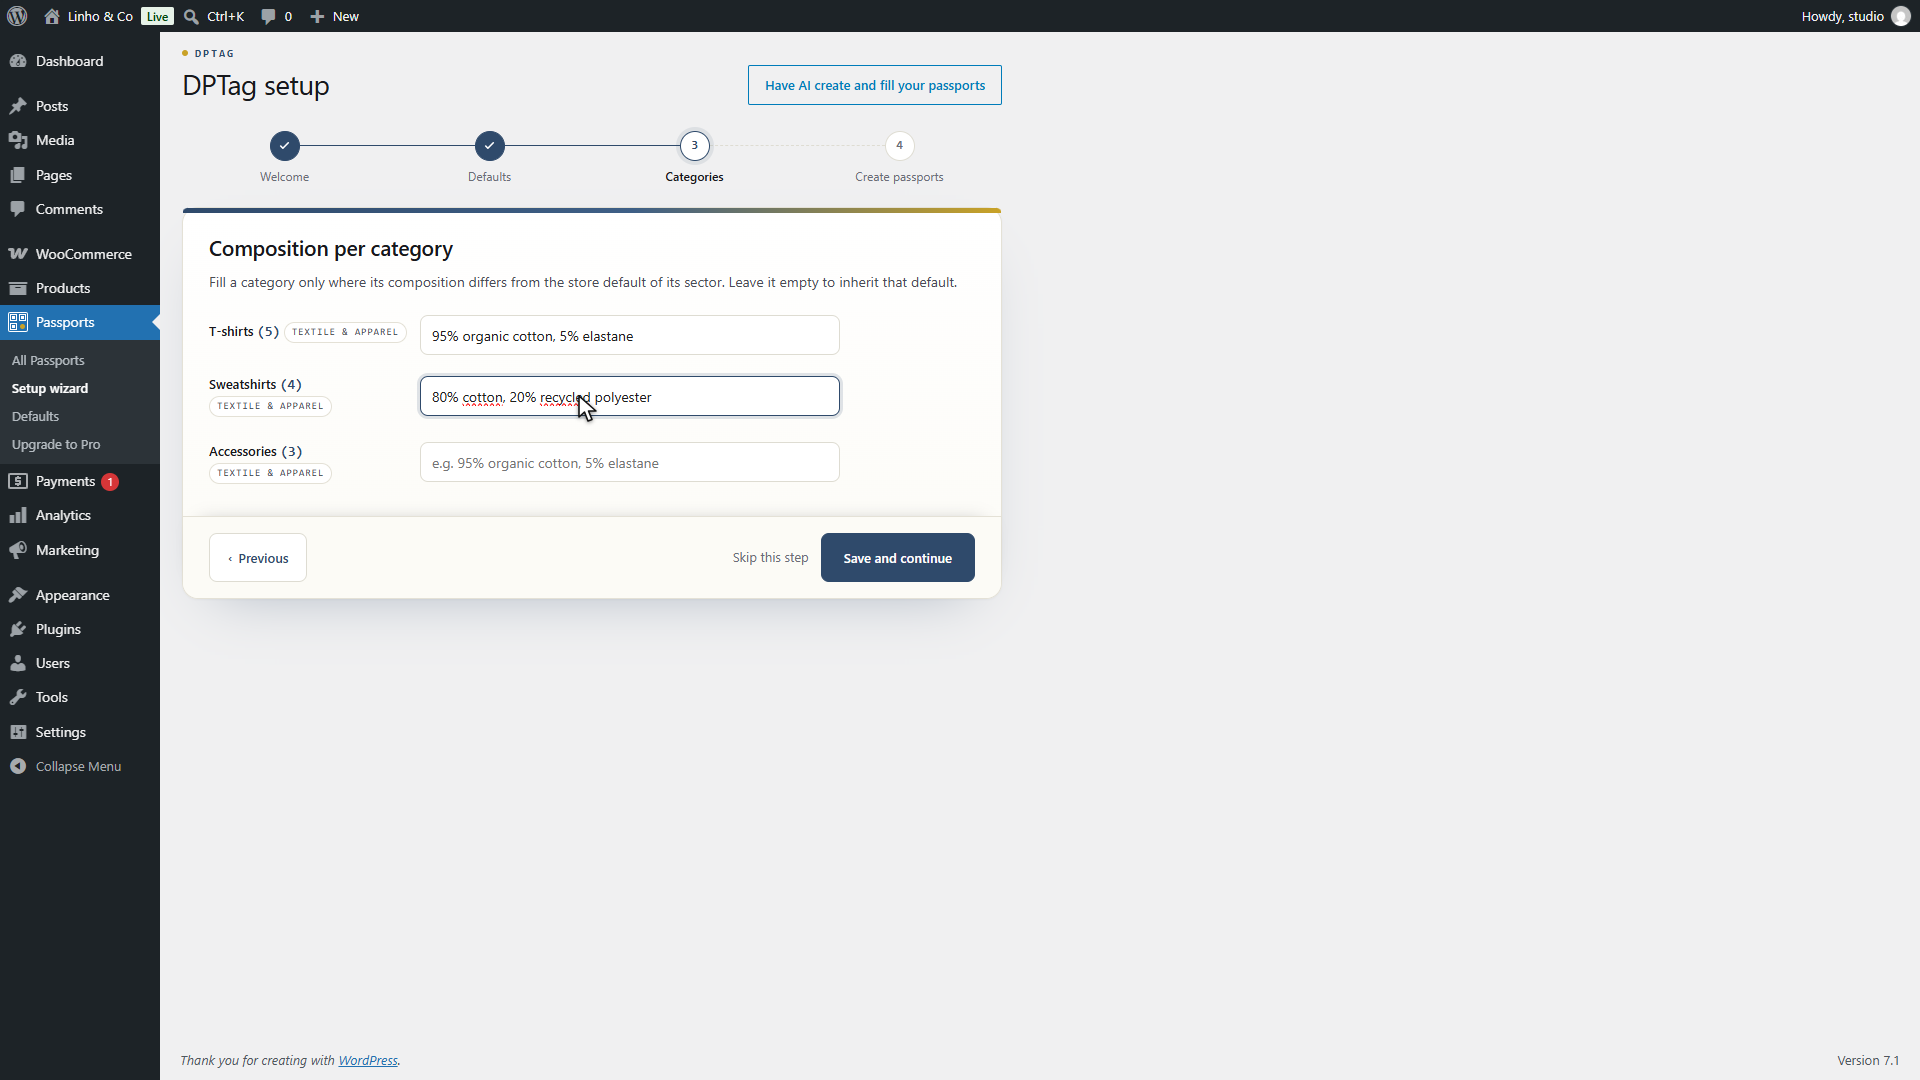
Type the composition as you would print it on a label: "95% organic cotton, 5% elastane". The percentages are parsed from the text, in either order ("Cotton 80%" works as well), in English or in French. A category left empty simply inherits the store default, if you set one.
Click Save and continue.
Step 3: bulk creation
The last step creates the passports. One click, one passport per product without one, pre-filled from the defaults you just set and from the product attributes DPTag detected on each product.
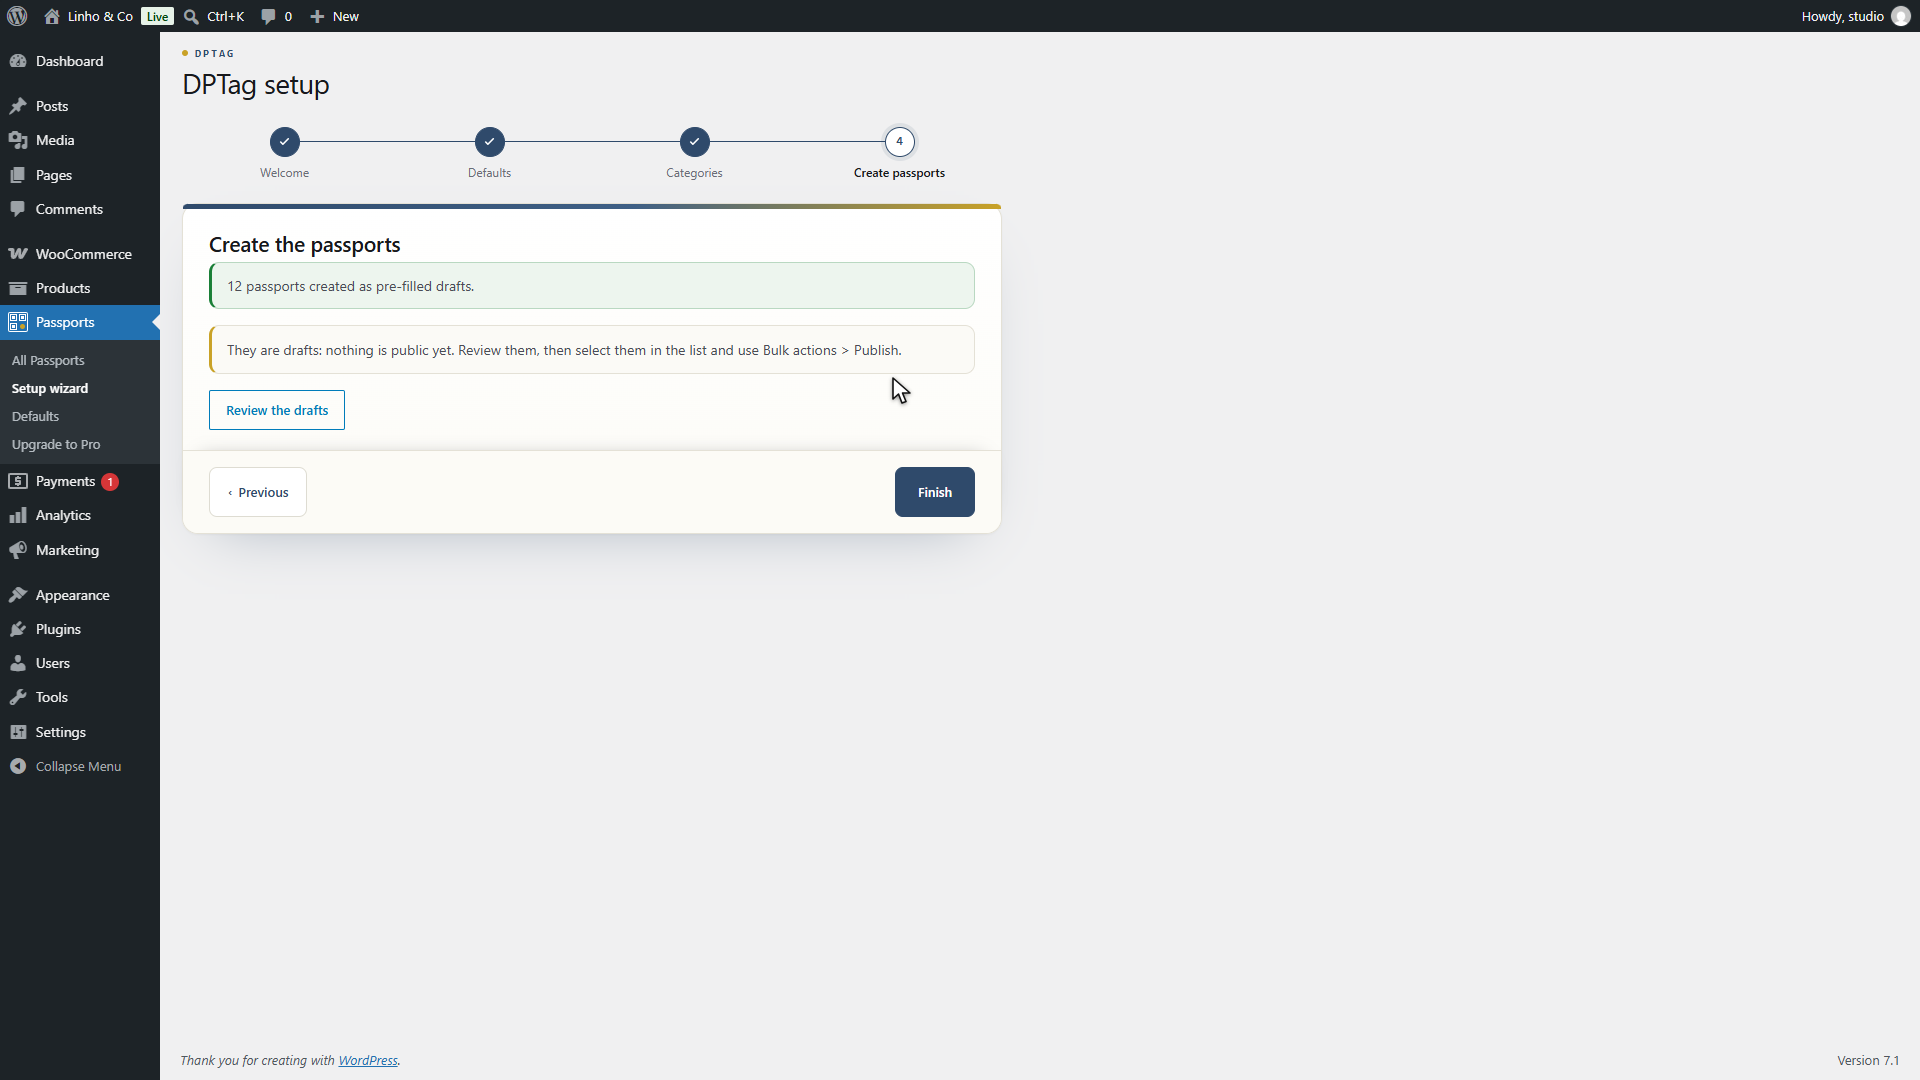
The passports are created as drafts. Nothing is public yet: a passport only gets a public page and a QR code when you publish it, which is a decision you take product by product or in bulk from the list.
The list and the completeness score
Click Review the drafts to open the passport list.
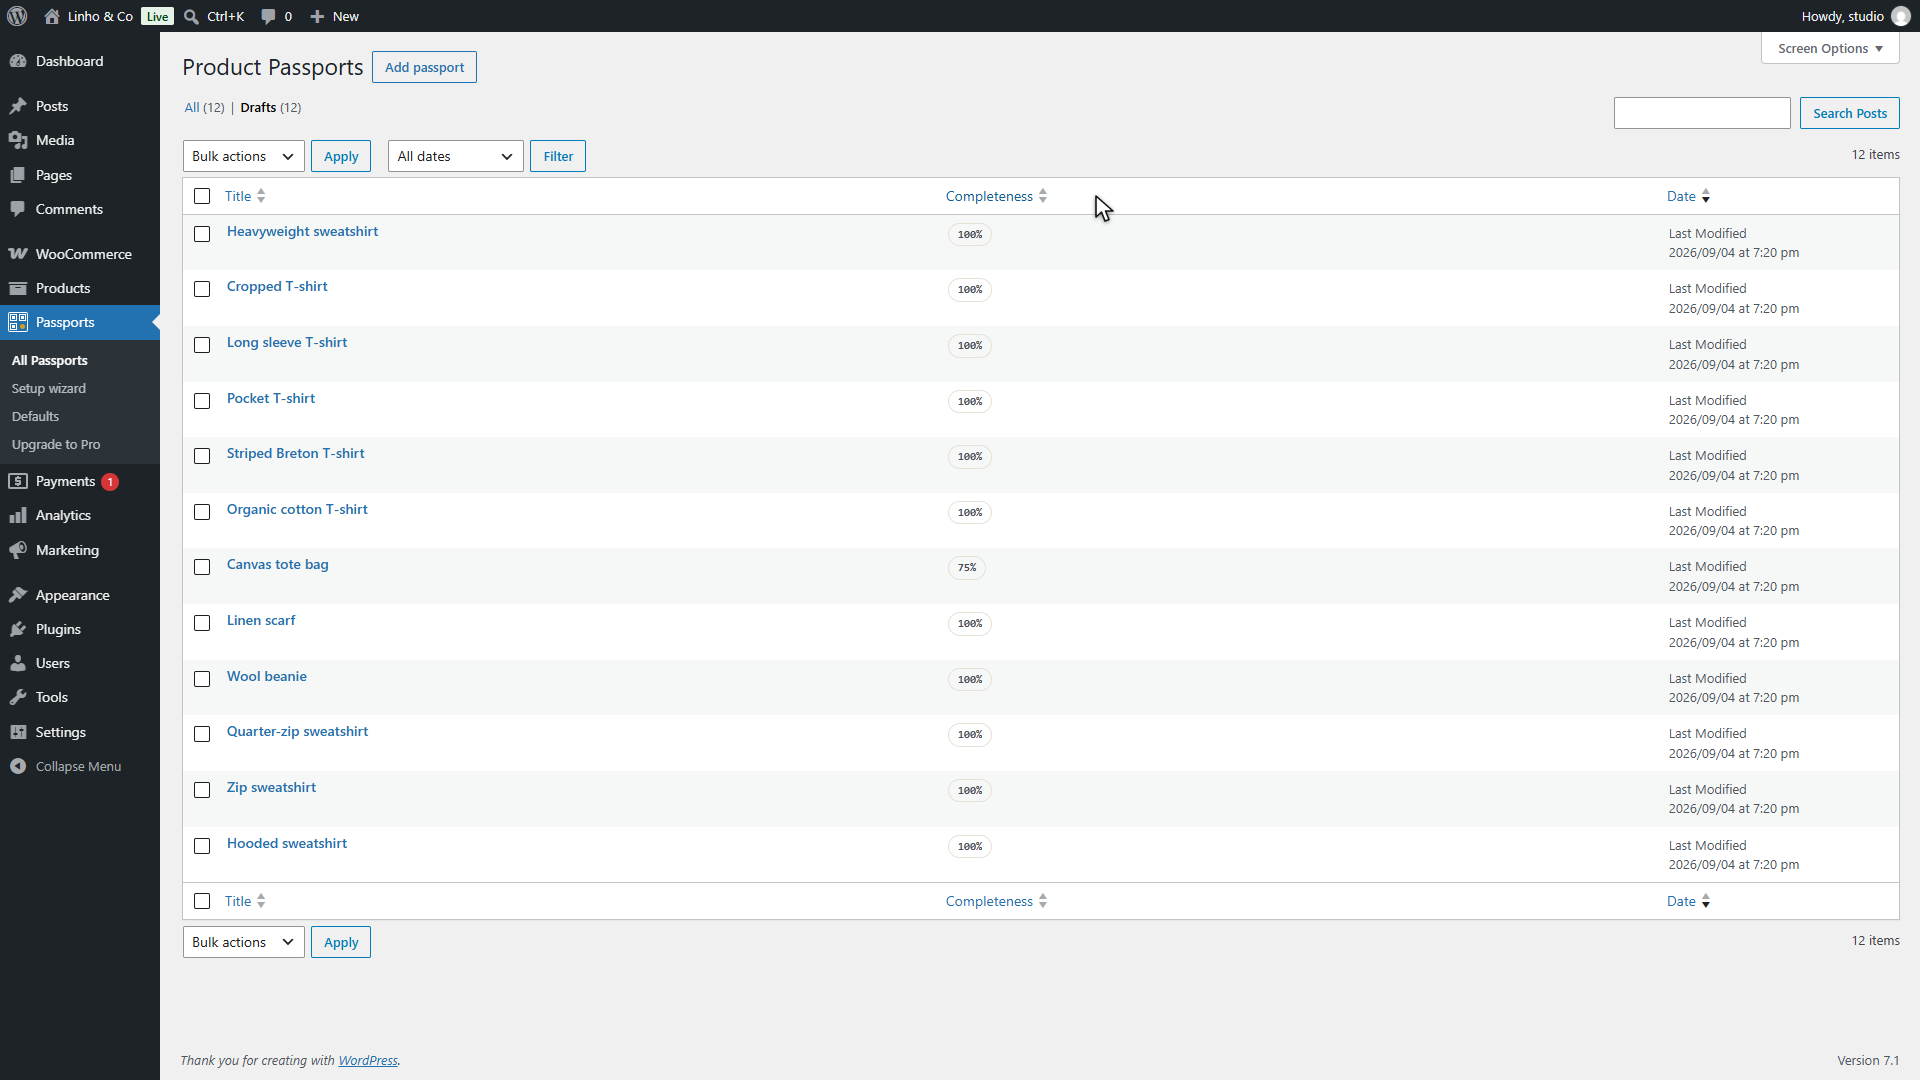
Each row shows a completeness score. It counts the required fields of the product's sector template: for textile, the fibre composition, the country of origin, the care instructions and the recycling instructions. A passport at 100% has all four; a lower score tells you, before you publish, which products still need a detail.
Open and complete a passport
Open the organic cotton T-shirt. Its score is already at 100%: the country of origin and the care instructions came from the store defaults, the composition came from its category, and the fibre bar at the top of the composition group is drawn from it.
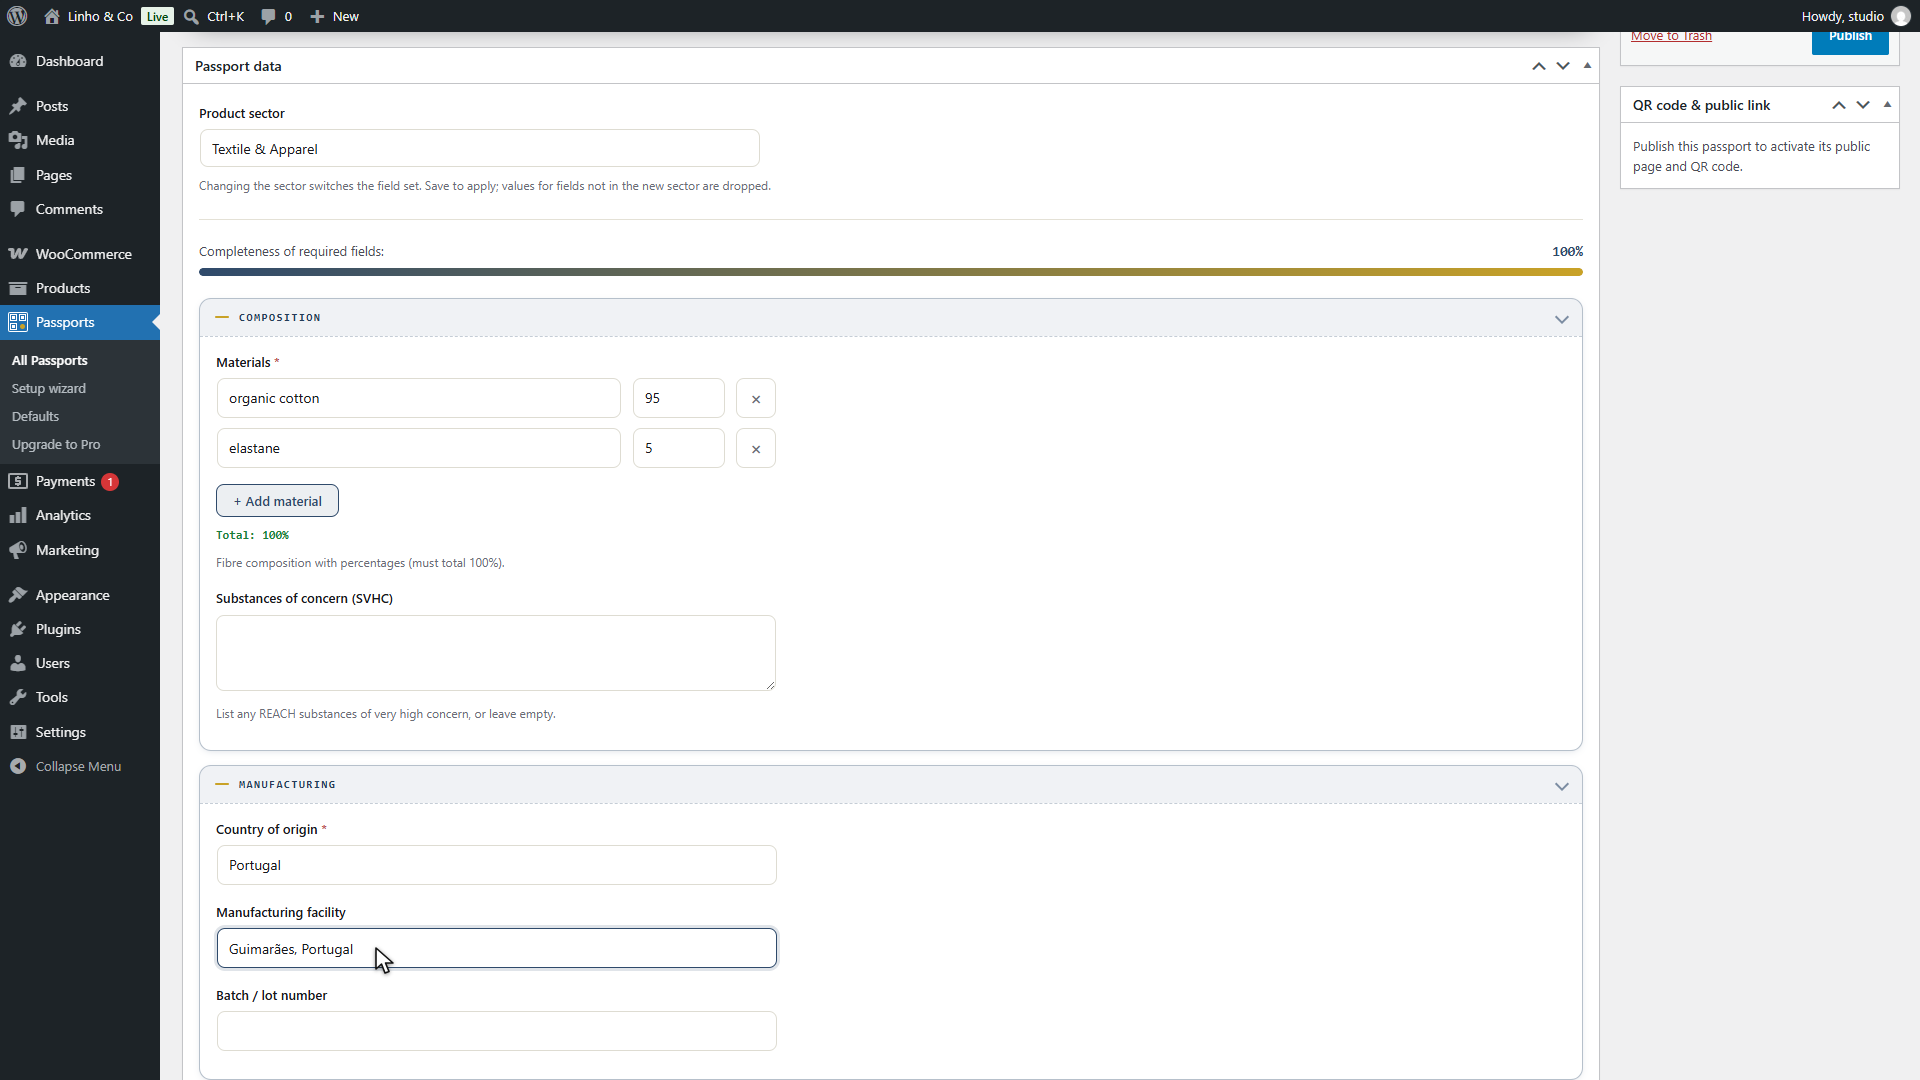
What is left is what is specific to this product. On the demo store, that is the GOTS certification and the manufacturing facility. Every field of the form follows the ESPR requirements known today, so the data you enter is structured and ready for the official formats when the delegated acts publish them.
Publish and download the QR code
Click Publish. That is what activates the public page and the QR code: both appear in the QR code and public link box, below the form.
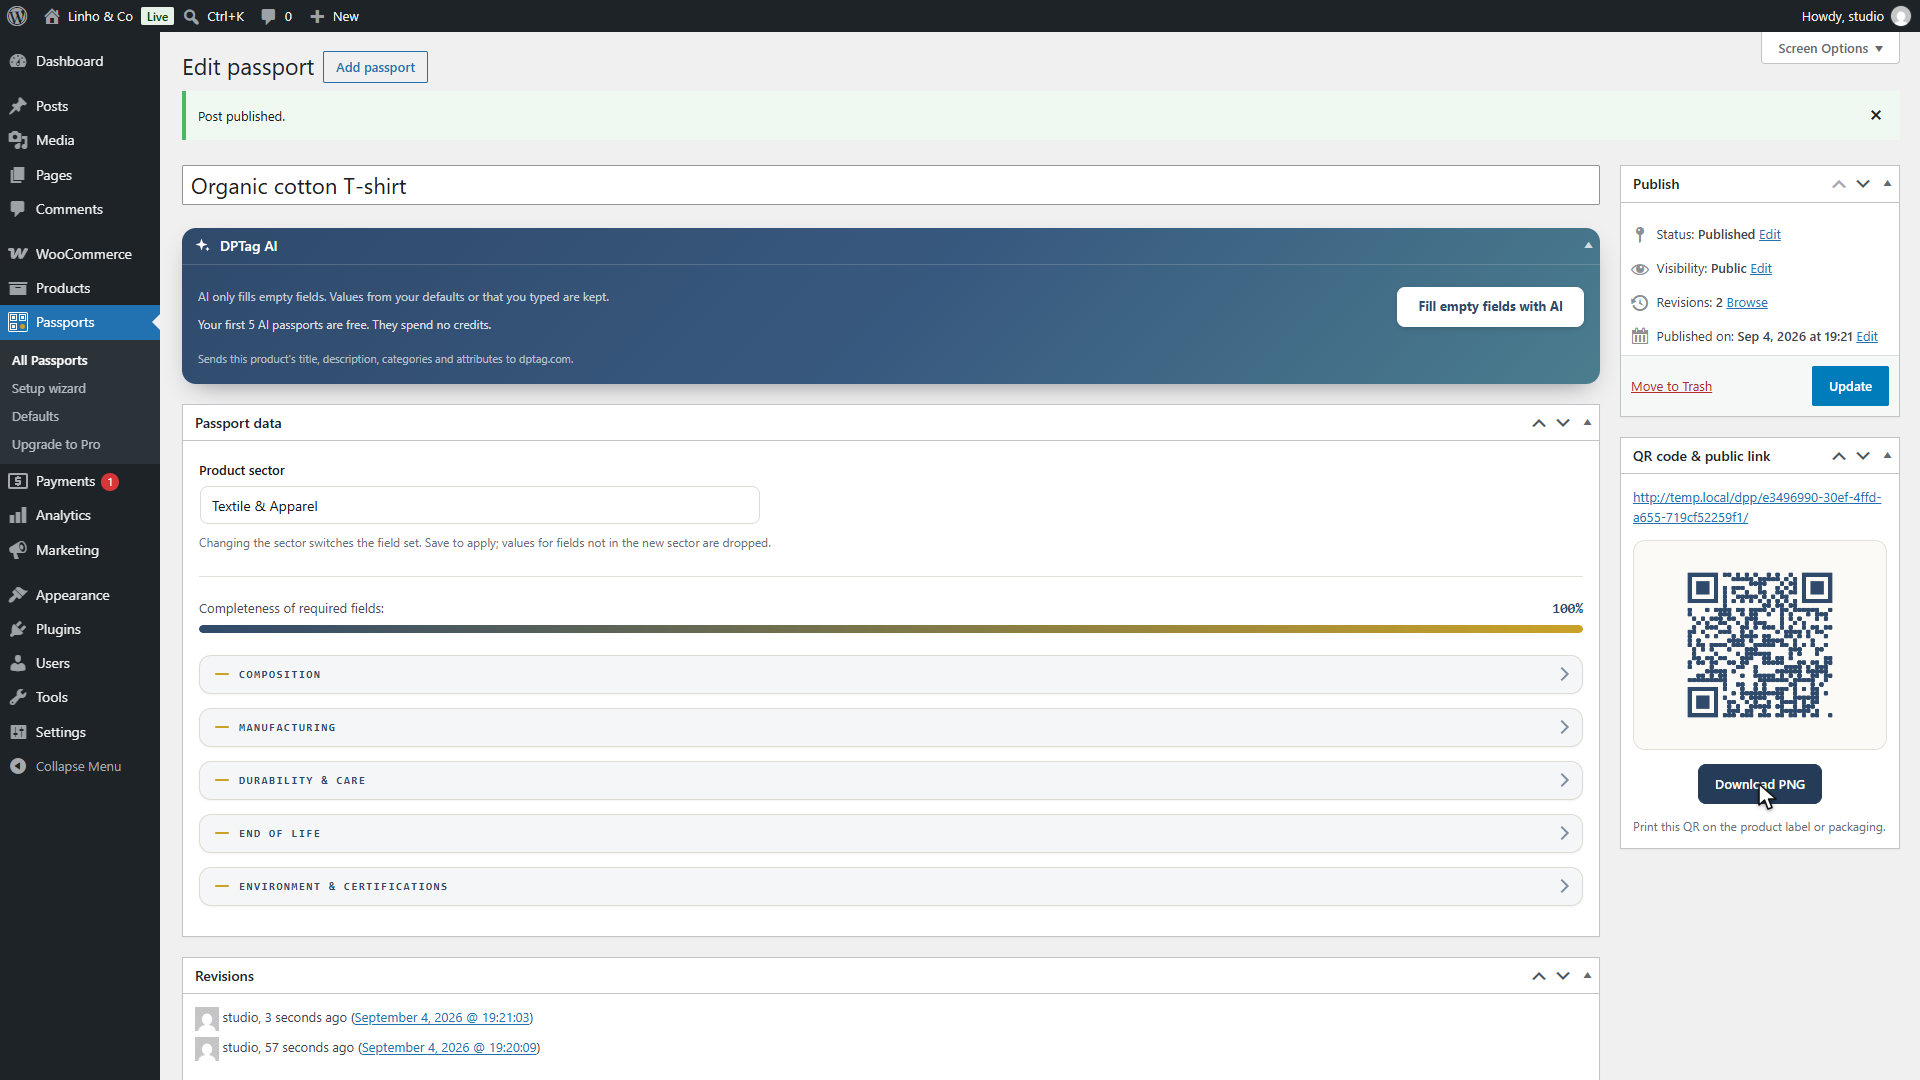
The QR code is generated right there, in your browser, by a library bundled with the plugin. It never leaves your site and no third party sees it. Download the PNG and print it on the label, the hang tag or the packaging.
The code points to the passport's public address, which is built on a unique identifier that never changes. A printed code therefore stays valid across every later edit of the passport, and even if the product is one day removed from the catalogue.
The public page, as a customer sees it
Scan the code with a phone, or open the public link.
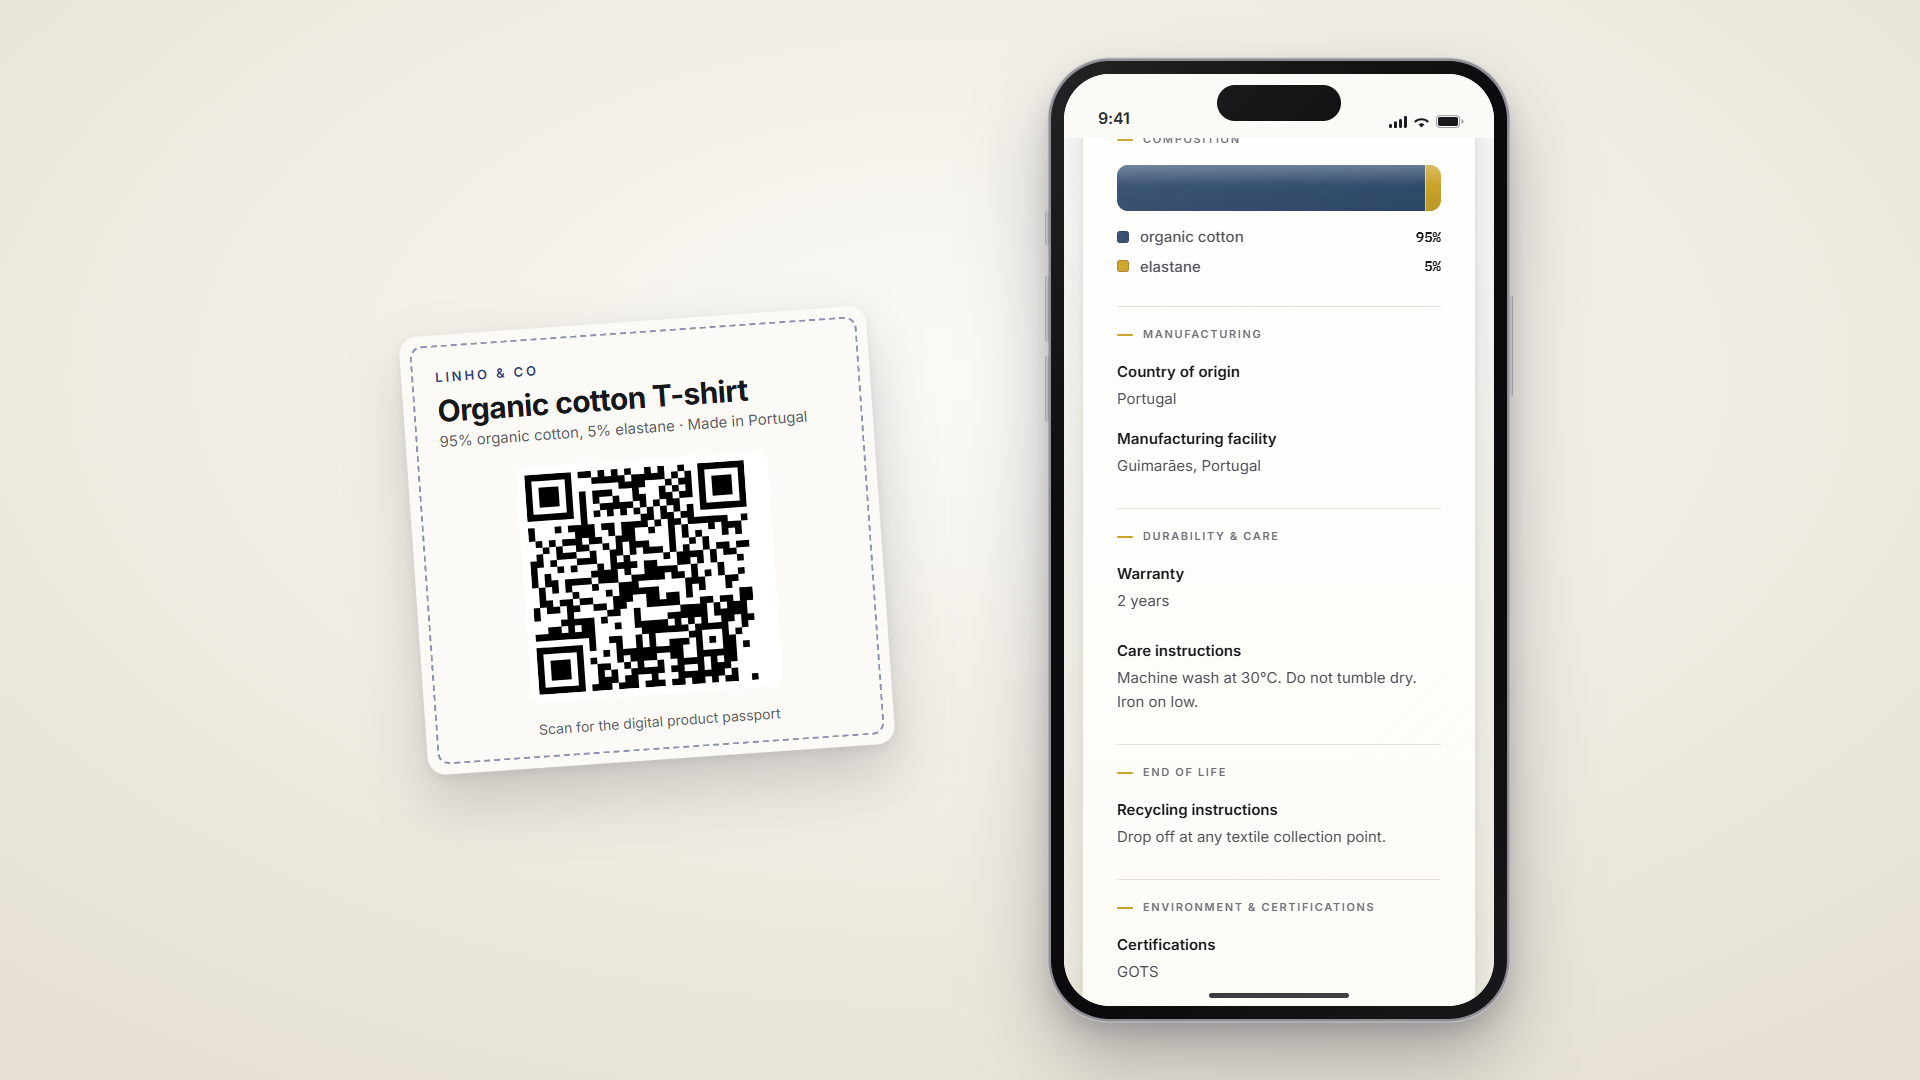
The page shows the composition with its bar, the origin, the care and the recycling instructions, on a layout designed for a phone screen first. It is served by your WordPress, independently of your theme, and carries schema.org structured data so that search engines read the same information.
Where to go from here
Twelve products, one wizard, and the first passport is live. From here:
- Complete the drafts. Open each passport whose score is below 100% and add what the defaults could not know.
- Publish in bulk. Select several passports in the list and publish them in one action, once their data is in.
- New products. A passport can be created from the product editor or from the products list, with the same defaults applied.
- Refine the defaults. Passports, then Defaults, holds the store-wide values, per sector template.